
Ter info:
Alle op deze pagina omschreven informatie is louter informatief en geenszins een blinde handleiding om zelf te gaan sleutelen aan je motor. Het gebruik van deze informatie is op eigen verantwoordelijkheid. Bij twijfel informeer steeds bij Uw dealer, garagist of de "echte" specialist.
Important info:
All described information is purely informative and in no way a blind manual to tinker with your motorcycle. The use of this information is under your own responsibility. When in doubt, always ask your dealer, garage or the "real" specialist.
Stator and regulator replacement
Here is a tutorial, and some pictures to help you all out.
**Before starting this, you should have a service manual and a decent amount of mechanical experience.
First off, you're going to want on hand your replacement parts. I went with Cycle Electric Inc. stock replacement parts. They are a high quality company, their regulator uses a better technology than OEM, and for me they are local (go Ohio!). Note the made in USA.

Next, you need to drain the primary and remove the primary cover. This involves taking off the shifter/linkage, which just means loosening a pinch bolt and prying it off. The primary bolts are standard hex head cap screws. Some are longer than others, so keep track. If you forget, the manual shows which go where. The derby cover and clutch adjusting screw locknut/spring also come off. My shifter splines are slightly rusty thanks to rainy weather, so it's a bitch to get off. Yours might be easier. Drain...

and this is what it will look like when you get the cover off (protip, no need to take off the clutch cable).

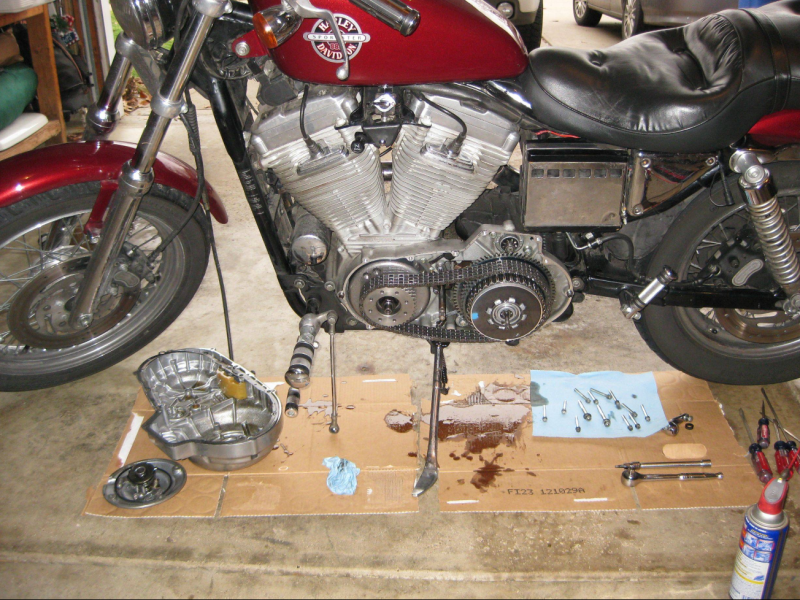
Now comes the fun part. The whole clutch, rotor and primary chain assembly will come off as one. On my bike, the crank sprocket nut is 1-1/8" 6-pt deepwell socket, and the clutch is 1-3/16" 6-pt standard socket. The crank nut is normally threaded, while the clutch is LH threaded (meaning it is righty loosey, contrary to the normal rhyme).
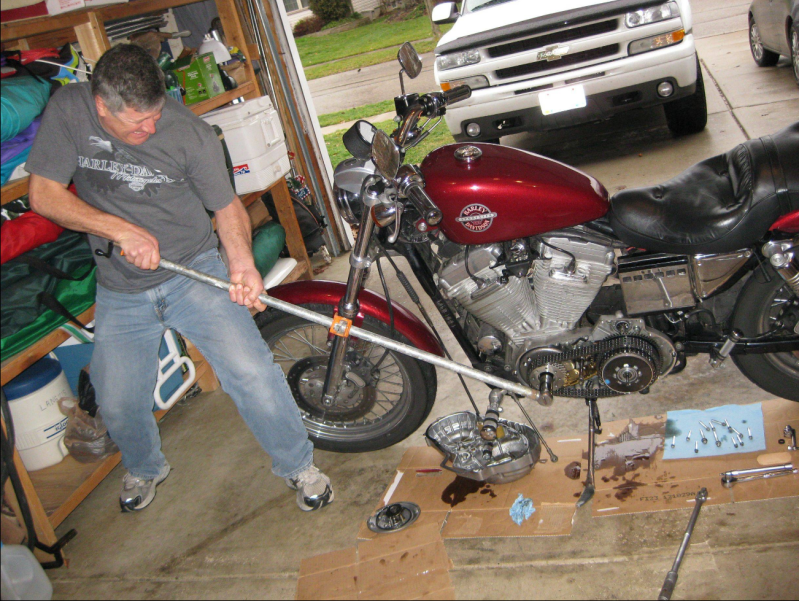
The crank and clutch sprocket use red loctite, so you need to heat them first. I used a small propane torch. Run it around so as not to heat just one spot, and slowly heat the entire area. Then you get in there and break the nut loose. I had to use a 4 and 1/2 foot breaker bar, a large piece of iron pipe that fit over my 1/2" drive ratchet.
The key here is the locking tool. This prevents you from turning the engine/transmission while you attempt to loosen the nut. This "tool" is simply a 4" brass door hinge. Get the solid brass, and not brass-plated, as this will ideally break before you break one of your sprockets since brass is softer than steel.
Brass door hinge "locking tool". Use both parts, mine bent while trying only one piece of the hinge. Cost was only about $10 vs. the expensive tool. Notice that it angles. This depends on whether you are loosening or tightening the bolt. Use your judgement to determine which way prevents rotation. The service manual explains this better than I want to.

The crank sprocket is 180-210 ft-lbs on my bike (and near 240 ft-lbs on rubbermounts). It is NOT easy to get off, despite heat and a huge breaker bar. This is a "re-enacted" picture of my dad breaking it off after my 165lb body weight was insufficient to break it loose despite hanging on the bar. The H-D shirt was purely coincidence, I promise.
Here is what you will pull off once you get the clutch assy and sprocket/rotor off. It just slides off as a unit.

Behind the rotor and clutch reveals your stator (on the left), the black color is factory coating. On the right you can see the trapdoor and the ends of the mainshaft and countershaft for the transmission. Rubbermounts and on don't have a trapdoor, so this is all one piece cast into the rest of the case.

To remove the stator, unplug the connector near the front lower frame of the bike. Then pry out the plug that seals oil in the case. This is the part that was leaking on mine so bad that I couldn't afford to ride everyday to work without checking my oil level. Ain't nobody got time for that.

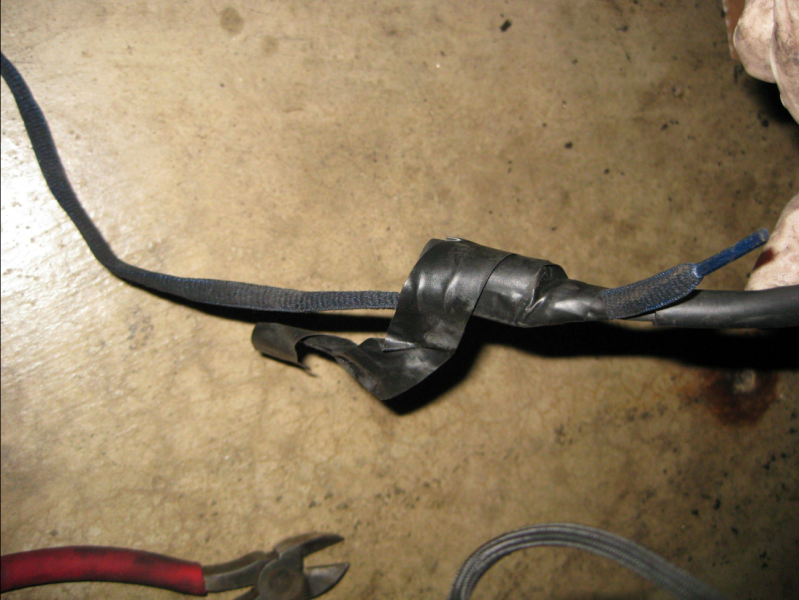
Before you pull the stator off by loosening the four bolts seen in the previous picture, tie some rope (in my case, shoestring) to the end of the cable. This makes it MUCH easier to pull the new cable through when you install your new stator. You won't find that piece of advice in the manual !
Shoestring and electrical tape. Good for a million things.
Here is the new stator in place. It came with the 4 new screws to install. The CE Inc. piece puts out more amps than the OEM H-D stator, which is beneficial for me in the winter running heated gloves.

Once you get the old stuff out, it is simply a matter of repeating the steps in reverse and following the torque values in the manual. The regulator is dirt simple. Two screws and it is on and off.
From here, it's just button everything up following the manual, and fill with fluid. Make sure to add red loctite to the clutch and crank nuts. A little will suffice, so don't go overboard. I had to rent a torque wrench, since mine didn't go that high. Autozone had one that went up to 250 ft-lbs, so no need to spend hundreds on a torque wrench you only need once (mine covers EVERY other bolt on the bike except for the crank sprocket nut, go figure).
So I hope this helps any of you looking to take on this repair. I strongly advise replacing the stock unit with an upgrade if yours fails. In my case, it didn't fail, it leaked out of the plug so much that I couldn't risk riding 7 days per week without having to check the oil level every day.
Credits to -Scuba10jdl
Ter info:
Alle op deze pagina omschreven informatie is louter informatief en geenszins een blinde handleiding om zelf te gaan sleutelen aan je motor. Het gebruik van deze informatie is op eigen verantwoordelijkheid. Bij twijfel informeer steeds bij Uw dealer, garagist of de "echte" specialist.
Important info:
All described information is purely informative and in no way a blind manual to tinker with your motorcycle. The use of this information is under your own responsibility. When in doubt, always ask your dealer, garage or the "real" specialist.

Maak jouw eigen website met JouwWeb